 Editor’s note: I inherited my grandmother’s recipe box when she died. Instead of finding recipes for the family favorites we loved to eat, I found instructions for foods most of us had never eaten. I’ve decided to try some of these recipes as I have time for a new series I’m calling “Pearl’s Kitchen.” I think Minnie Pearl Reeves Barron would approve of my kitchen adventures.
To say I was excited to find a recipe for Butterscotch Cookies was an understatement. Cookies that tasted like butterscotch pudding? Those delightful little hard candies? The ice cream topping?
Count me in.
Alas, they ended up more teacake than butterscotch, but there’s nothing wrong with that. They’re softer than the teacakes I grew up with, and pretty satisfying with a cup of coffee (I also imagine they’re a pretty good accessory for a glass of milk).
A note on the “nut meat” question: This recipe seems to come from a time before we had access to any number of nut species from around the country. I split the dough in half and used chopped walnuts in one half and chopped pecans in the other. (Pecans readily grew close to the part of Mississippi where my grandmother lived, so I assume that was probably her nut of choice, and walnuts are readily available in Costco, so that’s my nut of choice.) Both were delicious, and made little difference in flavor. I may lightly toast the nuts before adding them if I make these again.

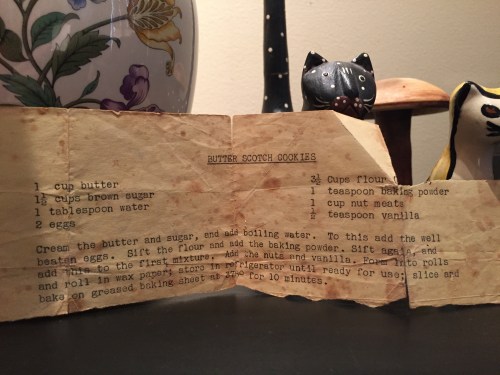
Butterscotch Cookies
1 cup butter
1 1/2 cups brown sugar
1 tbsp. boiling water
2 eggs, well-beaten
3 1/2 cups flour
1 tsp. baking powder
1 cup nut meat (chopped nuts of your choice)
1/2 tsp. vanilla
Cream the butter and sugar, and add boiling water. Add eggs. Sift flour and add the baking powder. Sift again, and add this to the first mixture. Add nuts and vanilla.
Form into rolls and roll in wax paper; store in refrigerator until ready for use. Slice and bake on greased (I used parchment paper) baking sheet at 375 degrees for approximately 10 minutes. (My oven had them ready at 9 minutes – they didn’t get very brown on top, but the bottoms were starting to brown, so watch them carefully.)
I froze one roll for a week; after thawing, I sliced and baked and the cookies were as good as they were the first time. So these could be a good make-ahead cookie.


